How to Create a New Working Calendar in Microsoft Project
Microsoft Project – How to Create a New Calendar with Public Holidays
Go to the Project tab > under the Properties ribbon section click on the Change Working Time command

Figure 1: Project Tab and Properties Ribbon
In the Change Working Time command window, click Create New Calendar

Figure 2: Change Working Time Command
Another window will pop up called Create New Base Calendar with ‘Copy of Standard’ highlighted. Keep ‘Make a copy of’ selected with the Standard calendar selected in the dropdown list.
Note – You can always start a completely new calendar by selecting ‘Create a new base calendar’.
Rename the new Calendar. In the screenshot example below, I have called it ‘The Big Project’.
Click > Okay

Figure 3: Selecting Create New Base Calendar
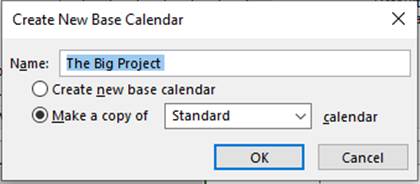
Figure 4: Naming the New Base Calendar
To add public holidays, navigate to the Exceptions tab. In the rows, name the public holidays and select the start and finish dates in the corresponding columns.
In the example below, I have used public holidays for the remainder of the year.

Figure 5: Inserting Public Holidays
If you plan on using the calendar past the expected project’s completion date, you can make the exception recurring.
Select the row for the specific exception. Then click Details. The Details for ‘Exception’ selected window will pop-up.
In the Details window, you can set custom working or non-working hours as well as the recurrence pattern.
In the example below, I have selected Labor Day. The full day has been left as a non-working day and the recurrence pattern has been set to yearly which will end of 10 occurrences.

Figure 6: Setting Recurrence for Exceptions
To apply the new calendar, go to the Project tab, select the Project Information command which can be found in the Properties ribbon.

Figure 7: Project Tab and Properties Ribbon showing the Project Information Command
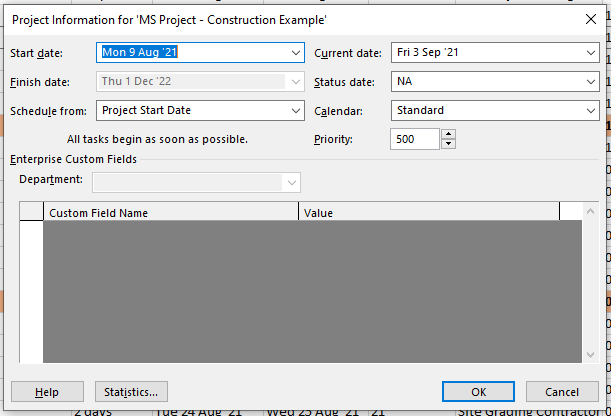
Figure 8: The Project Information Window

Figure 9: Changing the Calendar